

The holiday season is synonymous with rich flavors, togetherness, and, of course, the star of every Thanksgiving dinner – the turkey. But for many, cooking a turkey can seem intimidating. Whether you’re a seasoned cook or a beginner, the key to making a memorable Garlic and Herb Thanksgiving Turkey lies in simplicity and flavor. This recipe focuses on achieving that golden, crispy skin and tender, juicy meat without the need for complicated techniques or days of preparation.
In this guide, I’ll walk you through every step of preparing and roasting the perfect Garlic and Herb Thanksgiving Turkey, so you can impress your guests and enjoy a stress-free holiday meal. This turkey recipe is easy to follow and designed to ensure that your Thanksgiving feast is a true success!
Why Choose Garlic and Herb for Your Thanksgiving Turkey
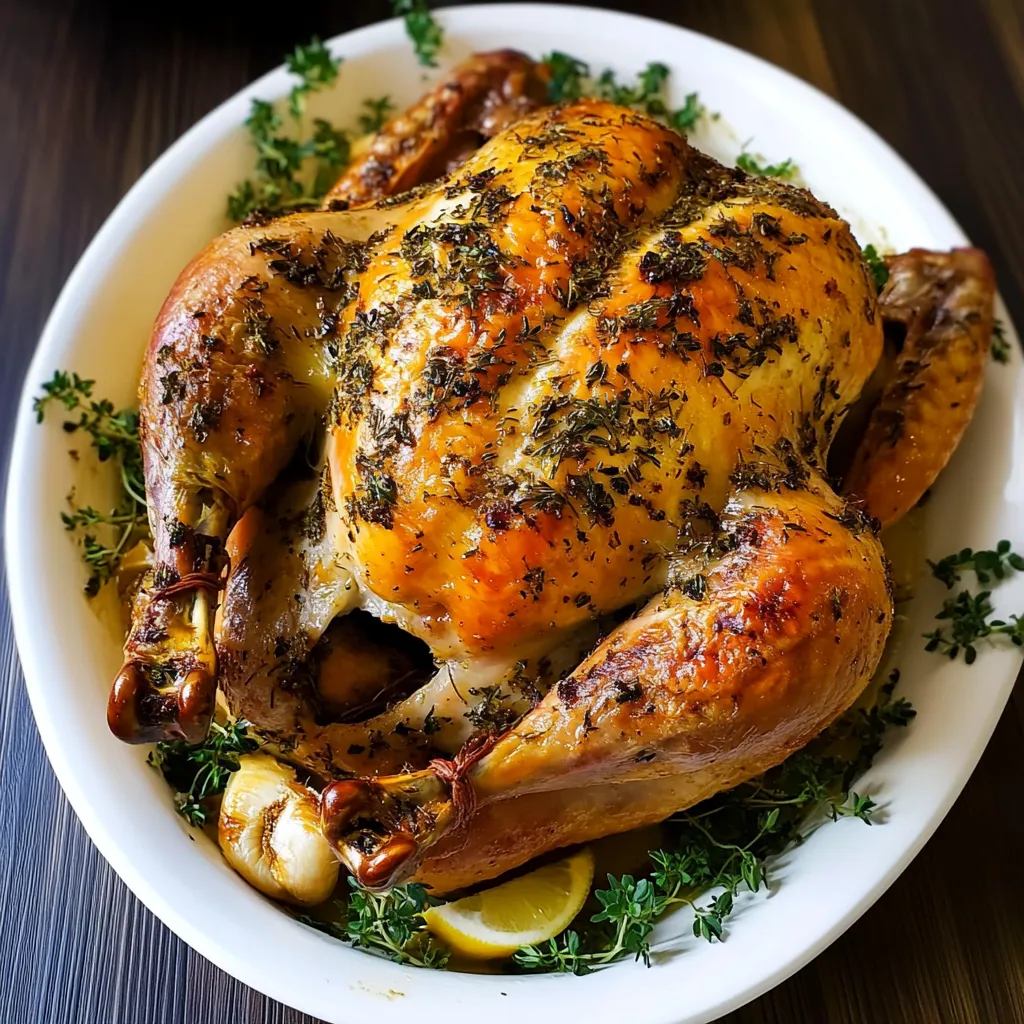
When it comes to turkey, the flavor profile is everything. While a plain roasted turkey might do the job, infusing it with aromatic garlic and a variety of fresh herbs can elevate your dish to another level. The Garlic and Herb Thanksgiving Turkey provides a delightful blend of savory, earthy, and slightly citrusy notes that complement the natural flavor of the turkey. The fresh herbs — including rosemary, thyme, and parsley — combined with the richness of butter and garlic, help keep the meat moist while adding an irresistible fragrance to your kitchen.
This garlic and herb rub is not only easy to prepare, but it also ensures that the turkey is infused with flavor from the inside out. It’s perfect for first-time turkey cooks or anyone looking for a no-fuss but impressive dish to serve.
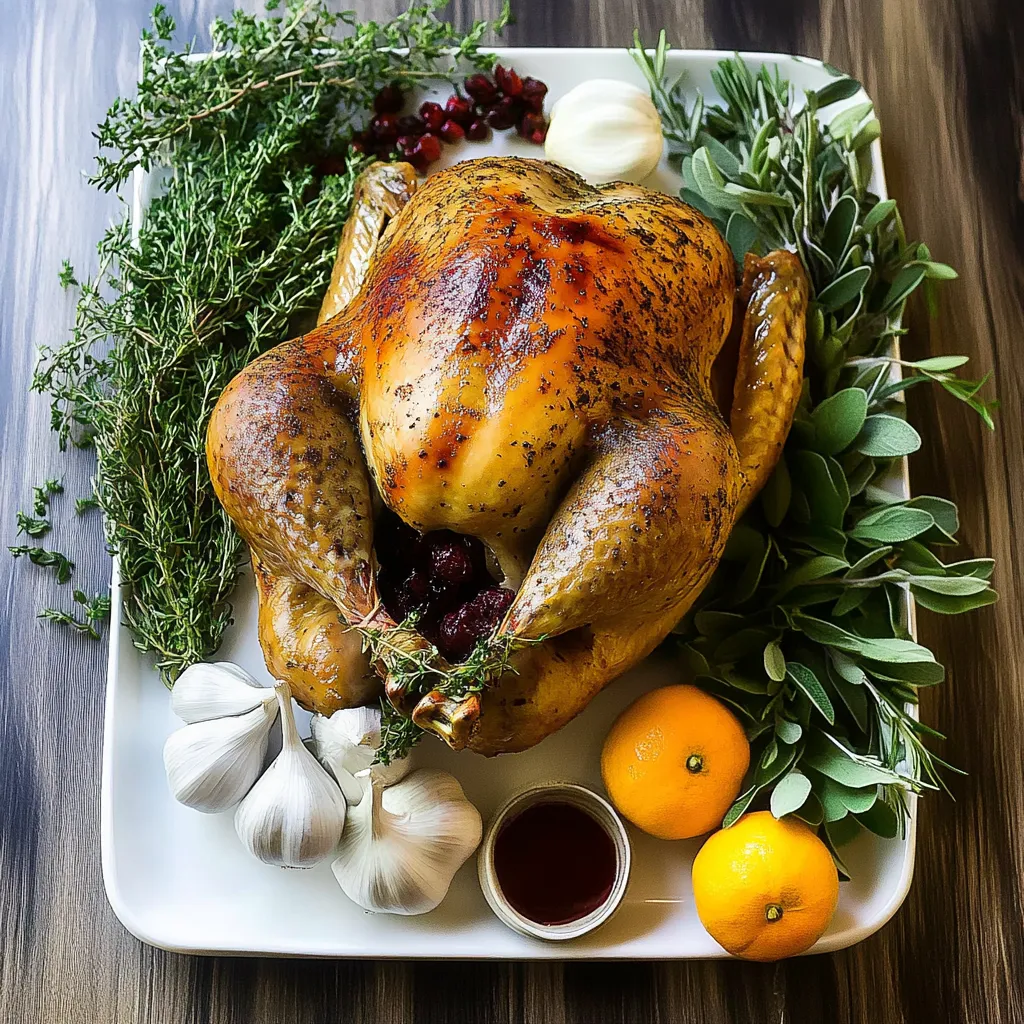
Ingredients for Garlic and Herb Thanksgiving Turkey
Before diving into the cooking process, let’s take a look at the essential ingredients that will make your turkey flavorful and aromatic.
1. Turkey
-
A 12-15 lb turkey is ideal for this recipe, but you can adjust the cooking time depending on the size of the bird. Fresh or frozen turkeys work equally well, though if you opt for a frozen turkey, be sure to allow ample time for thawing in the refrigerator (at least 3 days for a 12-15 lb bird).
2. Butter
-
Unsalted butter helps to season the turkey skin and encourages a golden, crispy exterior. It also allows the herbs and garlic to infuse the skin beautifully.
3. Herbs
-
Fresh herbs like rosemary, thyme, parsley, and basil are perfect for this recipe. They bring a fragrant and fresh element to the turkey. If fresh herbs aren’t available, dried herbs work as well — just reduce the quantity to half.
4. Garlic
-
Garlic is the heart of this dish. The combination of garlic in the butter rub and the stuffed garlic cloves inside the cavity of the turkey ensures that each bite is full of aromatic flavor.
5. Lemon
-
The zest of a lemon brightens up the rich, savory flavors of the turkey and complements the garlic. Additionally, stuffing the cavity with a halved lemon adds even more citrus flavor to the meat.
6. Onions, Celery, and Lemons
-
These ingredients are used to stuff the cavity of the turkey, further infusing the meat with flavor as it roasts. They also help to create delicious turkey drippings, which can be used for gravy later.
7. Salt and Pepper
-
A generous sprinkling of coarse kosher salt and freshly ground black pepper is essential to season the turkey inside and out. Be sure to coat the turkey evenly for the best flavor.
Preparing Your Garlic and Herb Thanksgiving Turkey
1. Thawing the Turkey
-
If you’re starting with a frozen turkey, ensure that it’s properly thawed before roasting. Place it in the refrigerator for at least three days (longer for larger birds). This is essential for even cooking and to ensure your turkey stays juicy.
2. Preparing the Herb Butter Rub
-
In a medium-sized bowl, mix the softened unsalted butter with finely chopped fresh herbs (rosemary, thyme, parsley) and garlic. Add lemon zest to the mix for an extra burst of flavor. This will be the key to creating that golden, flavorful skin on the turkey.
3. Seasoning the Turkey
-
Pat the turkey dry with paper towels to remove any excess moisture. This step is crucial for achieving crispy skin. Once dry, use your hands to slather the garlic-herb butter all over the turkey, including under the skin of the breast (gently loosen the skin using your fingers) and inside the cavity. Be generous with the butter to ensure every part of the bird is coated with flavor.
-
Season the turkey with salt and pepper generously. Don’t forget to season inside the cavity as well.
4. Stuffing the Turkey
-
Stuff the cavity of the turkey with half an onion, a head of garlic (cut in half), celery sticks, and a halved lemon. These ingredients will infuse the turkey with even more flavor as it roasts, making every bite aromatic and tender.
-
Tie the drumsticks together with kitchen twine to ensure they cook evenly. Tuck the wings under the turkey to prevent them from burning during roasting.
Roasting Your Garlic and Herb Thanksgiving Turkey
Now that your turkey is prepped and ready to go, it’s time to move on to the roasting process. This is where the magic happens, and you’ll see that achieving the perfect Garlic and Herb Thanksgiving Turkey is simpler than you might think.
1. Preheat Your Oven
-
The key to getting that golden, crispy skin is starting at a high heat. Preheat your oven to 450°F (232°C). The high temperature at the beginning helps the turkey’s skin to crisp up, while still allowing the meat to cook through evenly.
2. Positioning the Turkey in the Oven
-
For even cooking, place the turkey on a roasting rack inside a roasting pan. This allows hot air to circulate around the turkey, ensuring that it cooks evenly and doesn’t sit in its own juices. The rack helps keep the turkey elevated, preventing it from becoming soggy.
-
Remove any racks in your oven except for the one at the bottom or the second-to-bottom level. Make sure there’s enough space for the turkey to fit comfortably.
3. Roasting the Turkey
-
Place the turkey in the oven and roast at 450°F for 30 minutes. This high temperature will help you achieve a crispy, golden skin. Don’t worry if the skin darkens during this initial phase; it’s perfectly normal.
-
After 30 minutes, reduce the temperature to 350°F (175°C) and continue roasting for the remaining time. The total roasting time will depend on the size of your turkey.
-
General roasting times:
-
For a 12-15 lb turkey, roast for about 3 to 3 1/2 hours.
-
For a 16-20 lb turkey, roast for about 3 1/2 to 4 hours.
-
For a 21-24 lb turkey, roast for about 4 to 4 1/2 hours.
-
For a 25 lb turkey or larger, roasting time may reach up to 5 hours.
-
4. Basting the Turkey
-
Unlike some traditional turkey recipes, you don’t need to baste the Garlic and Herb Thanksgiving Turkey during roasting. The butter and herb rub you’ve applied will do the work of keeping the turkey moist and flavorful as it cooks.
-
However, if you like a super crispy skin, you can tent the turkey with foil during the majority of the roasting process, removing the foil in the last 20-30 minutes to allow the skin to brown and crisp up.
5. Checking for Doneness
-
The best way to check if your turkey is done is by using a meat thermometer. Insert the thermometer into the thickest part of the thigh (avoiding the bone). The turkey is cooked when the thermometer reads 165°F (74°C). For optimal results, ensure the thermometer touches only the meat, not the bone.
-
It’s always a good idea to check the turkey’s temperature 45 minutes before the expected finish time to avoid overcooking. If the temperature isn’t quite there, continue roasting, checking every 10-15 minutes.
6. Letting the Turkey Rest
-
Once your turkey reaches the desired internal temperature, remove it from the oven. Don’t carve it immediately! Tent the turkey with foil and let it rest for at least 30 minutes before carving. This rest period allows the juices to redistribute throughout the meat, keeping it juicy and flavorful.
-
While your turkey is resting, you can prepare the gravy using the flavorful turkey drippings left in the roasting pan.
Tips for Perfect Garlic and Herb Thanksgiving Turkey
Even though this recipe is designed to be simple and stress-free, here are a few tips to ensure your Garlic and Herb Thanksgiving Turkey turns out perfectly every time:
1. Thaw Your Turkey Properly
-
If using a frozen turkey, remember that thawing takes time. Plan ahead and thaw the turkey in the fridge for 3-4 days (depending on the size). Thawing in cold water can speed up the process, but always follow proper safety guidelines to avoid foodborne illness.
2. Keep the Skin Dry
-
The drier the skin, the crispier it will become when roasted. Pat the turkey thoroughly dry with paper towels before applying the butter and herbs.
3. Use Fresh Herbs
-
Fresh herbs will infuse your turkey with more aromatic flavors than dried herbs. If you must use dried herbs, reduce the quantity by half to avoid overpowering the turkey.
4. Don’t Forget the Stuffing Ingredients
-
While the garlic, onions, and lemon inside the turkey’s cavity may seem like optional ingredients, they are essential for adding depth of flavor. They’ll help to infuse the turkey with aromatic goodness as it roasts.
5. Rest Your Turkey Before Carving
-
Always let your turkey rest for at least 30 minutes after roasting. This helps the juices redistribute throughout the meat, ensuring a juicy and tender turkey.
What to Serve with Garlic and Herb Thanksgiving Turkey
While your Garlic and Herb Thanksgiving Turkey will be the star of the show, the sides you pair with it can elevate the entire meal. Here are some classic and complementary sides that go beautifully with this turkey recipe:
-
Garlic Mashed Potatoes: Creamy mashed potatoes with a hint of garlic will complement the flavors of the turkey.
-
Crispy Roasted Brussels Sprouts: Their slight bitterness and crispy texture offer a perfect balance to the rich, herby turkey.
-
Classic Stuffing: A traditional stuffing with herbs, onions, and celery brings comforting flavors to the table.
-
Cranberry Sauce: The tartness of cranberry sauce helps to cut through the richness of the turkey and its buttery skin.
-
Roasted Carrots and Parsnips: The natural sweetness of roasted carrots and parsnips is a great contrast to the savory turkey.
Pair these dishes with your Garlic and Herb Thanksgiving Turkey for a Thanksgiving meal that will have everyone asking for seconds.
Carving Your Garlic and Herb Thanksgiving Turkey
Once you’ve roasted your Garlic and Herb Thanksgiving Turkey and allowed it to rest, it’s time to carve the bird. Carving a turkey properly ensures that you get the most out of your deliciously tender turkey, while also presenting it beautifully on the table. Here’s how to carve your turkey like a pro:
1. Prepare Your Tools
-
Before you start, make sure you have a sharp carving knife and a meat fork to stabilize the bird as you carve. A large cutting board is essential to catch the juices and avoid making a mess.
2. Remove the Legs
-
To start, place the turkey breast-side up on the cutting board. Use the carving knife to cut through the skin between the thigh and the body. Gently pull the leg away from the body and cut through the joint to remove it. Repeat for the other leg.
3. Separate the Thigh from the Drumstick
-
Once the legs are removed, cut through the joint that connects the thigh to the drumstick. You can also choose to serve these pieces whole or carve them into smaller pieces.
4. Carve the Breast
-
For the breast, start by cutting along one side of the breastbone, making long, smooth slices down to the ribcage. Keep your knife as close to the bone as possible to get the most meat off. You can cut these slices into smaller portions for easier serving. Repeat on the other side of the breastbone.
5. Serve the Wings
-
The wings can be served whole or you can remove them by cutting through the joint where the wing connects to the body.
6. Arrange the Carved Meat
-
Arrange the carved turkey on a platter, alternating between slices of breast, thigh, and drumstick for a visually appealing presentation. Don’t forget to drizzle a little bit of the turkey drippings over the meat to keep it moist.
Storing Leftover Garlic and Herb Thanksgiving Turkey
After the feast, there will likely be some turkey leftovers. Thankfully, Garlic and Herb Thanksgiving Turkey makes excellent leftovers. Here’s how to store and repurpose it:
1. Storing Leftovers
-
Once you’ve carved the turkey, place the remaining meat in an airtight container and store it in the refrigerator for up to 3-4 days. Make sure the turkey is completely cooled before storing it.
-
If you want to extend the shelf life of the turkey, consider freezing it. Simply store the meat in a freezer-safe container or Ziploc bag, and it will last for up to 3 months.
2. Repurposing Leftovers
-
Turkey Sandwiches: Make a quick and delicious turkey sandwich with leftover turkey, cranberry sauce, and some stuffing.
-
Turkey Soup: Use the leftover turkey bones to make a rich turkey broth, then add any leftover vegetables and some wild rice for a hearty turkey soup.
-
Turkey Tacos: Shred the leftover turkey and serve it with tortillas, avocado, and salsa for a quick meal the next day.
-
Turkey Salad: Mix leftover turkey with some mayo, celery, and grapes to make a refreshing turkey salad.
Tips for the Best Garlic and Herb Thanksgiving Turkey
To ensure your Garlic and Herb Thanksgiving Turkey is perfect, consider these additional tips:
1. Brine for Extra Moisture (Optional)
-
While this recipe does not require brining, some people prefer to brine their turkey for 12-24 hours before cooking. Brining helps to retain moisture, especially in larger birds. If you choose to brine, ensure to dry the turkey thoroughly before applying the herb butter.
2. Resting Time is Crucial
-
Rest your turkey for at least 30 minutes after roasting. This prevents the juices from spilling out when you carve it and ensures that the meat remains tender and juicy.
3. Use a Meat Thermometer
-
A meat thermometer is your best friend when roasting a turkey. It ensures you cook your turkey to the perfect temperature without overcooking it, which can dry out the meat.
4. Keep It Simple
-
The beauty of this recipe lies in its simplicity. The Garlic and Herb Thanksgiving Turkey doesn’t require a long list of ingredients or complicated techniques. Fresh herbs, garlic, and butter are all you need to achieve a flavorful, juicy turkey that everyone will love.
Conclusion on Garlic and Herb Thanksgiving Turkey
Cooking a Garlic and Herb Thanksgiving Turkey doesn’t need to be overwhelming. With the right ingredients, simple steps, and a little patience, you’ll have a delicious turkey that’s perfect for your Thanksgiving table. This recipe is ideal for both beginners and experienced cooks looking for a foolproof way to make a flavorful, juicy turkey.
By using fresh herbs, garlic, and butter, you’ll create a turkey that is not only moist and tender but also bursting with flavor. Whether you’re hosting a large gathering or a cozy family meal, this turkey will be the star of your holiday feast.
Enjoy the process, savor the results, and most importantly, have fun celebrating with your loved ones around the table!
Recipe card on Garlic and Herb Thanksgiving Turkey
Garlic and Herb Thanksgiving Turkey
Ingredients:
-
12-15 lb turkey (fresh or thawed)
-
1 stick unsalted butter (softened)
-
1/4 cup olive oil
-
3 tablespoons fresh rosemary (chopped)
-
3 tablespoons fresh thyme (chopped)
-
3 tablespoons fresh parsley (chopped)
-
Zest of 1 lemon (plus the lemon itself)
-
1/2 yellow onion (quartered)
-
1 stalk celery (chopped in long strips)
-
1 head garlic (cut in half)
-
1/4 cup coarse kosher salt (about)
-
2 tablespoons black pepper (to taste)
Instructions:
-
Preheat the oven to 450°F (232°C).
-
Prepare the turkey: Remove the giblets and pat the turkey dry with paper towels. Place it on a roasting rack in a roasting pan.
-
Prepare the herb butter: In a medium-sized bowl, mix the softened butter, olive oil, chopped herbs (rosemary, thyme, parsley), and lemon zest.
-
Season the turkey: Rub the garlic-herb butter generously all over the turkey, including under the skin of the breast and inside the cavity.
-
Stuff the cavity: Stuff the cavity of the turkey with the quartered onion, halved garlic, celery sticks, and halved lemon.
-
Season with salt and pepper: Sprinkle the salt and pepper generously on the turkey inside and out.
-
Roast the turkey: Roast the turkey in the preheated oven at 450°F for 30 minutes, then reduce the heat to 350°F (175°C). Roast until the internal temperature reaches 165°F (74°C), about 3-3.5 hours (depending on the turkey size).
-
Rest the turkey: After roasting, tent the turkey with foil and allow it to rest for at least 30 minutes before carving.
-
Carve and serve: Once rested, carve the turkey and serve. Optionally, drizzle with turkey drippings for added flavor.
Notes:
-
Thawing the turkey: If using a frozen turkey, be sure to allow 3-4 days for thawing in the refrigerator before cooking.
-
Brining: While this recipe does not require brining, you can brine the turkey for extra moisture if desired. If brining, ensure the turkey is thoroughly dried before applying the herb butter.
-
Herb substitutions: If fresh herbs are unavailable, use dried herbs. Just halve the quantities of dried herbs (e.g., 1 1/2 tablespoons dried rosemary instead of 3 tablespoons fresh).
-
Leftovers: Store leftover turkey in an airtight container in the refrigerator for up to 3-4 days. Turkey can also be frozen for up to 3 months.
Nutritional Facts (per serving):
-
Calories: 750 kcal
-
Fat: 45g
-
Saturated Fat: 14g
-
Carbohydrates: 1g
-
Fiber: 0g
-
Sugar: 0g
-
Protein: 89g
-
Cholesterol: 300mg
-
Sodium: 2700mg
-
Potassium: 1300mg
-
Vitamin A: 400IU
-
Vitamin C: 3mg
-
Calcium: 90mg
-
Iron: 9mg
Prep Time: 25 minutes
Cook Time: 3 hours
Total Time: 3 hours 25 minutes
Method: Roasting
Cuisine: American
Servings: 10-12
Calories: 750 kcal
Yield: 1 turkey (12-15 lb)